Create Custom Brushes in Photoshop
By Dub
dubtastic
Design Labs
Creating Custom Brushes in Photoshop
(this tutorial focuses on a grunge-y brush but you can use this to make any brush you'd like!)
After using the brushes others have created for some time, you may desire to
create your own, either for your personal use or distribution. One thing you
may have noticed is that when you download someone else's brushes, they come "packaged" in
a library. This tutorial will give you a brief explanation on how to
create a brush of your own, as well as package a series of
your brushes into a personalized library.
1. First step is to create a brush. Being
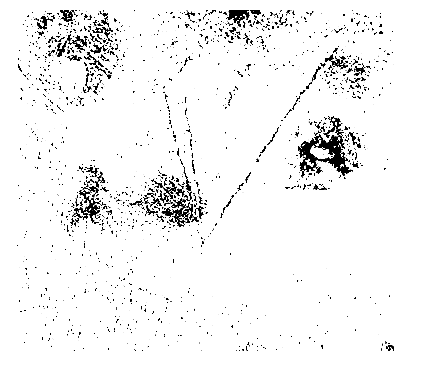
very fond of grunge brushes, I will create one now as an example. I am using
a portion of a digital image I took of some dirty concrete (To find some great
textures to work with, try Abnormis.com ). This will give me some of the dirt
that I am looking for. Taking only a small portion, I resize the image to a
reasonable brush size, and then run the sharpen filter on in (Filter > Sharpen > Sharpen
). The next step is to change the portion to black & white (Shift
+ Ctrl + U or Image > Adjust > Desaturate).
Now for the final changes. You need to adjust
the brightness & contrast of the image (Image > Adjust > Brightness/Contrast).
You should have something similar to the image below (depending of course on
which section of the concrete you selected):

Now, you can use some eraser tools to clean up or
add some variety into the image or leave it as it is. To
add this as a brush, select the portion you wish to use as a brush,
and then go to Edit > Define Brush. After you give your
brush a name it will show up in the brush palette.
Now, as I said before, most brushes are devliered as a part
of a set. If you want to do the same, the steps are really simple.
Photoshop will add your custom brush to the default set, however, if you
plan on distributing your set to others, it is a good idea to keep your brushes
seperate from the default Photoshop set.
Bring up the palette display showing the thumbnails of all
available brushes. There is a small arrow at the top right.
Clicking the arrow will bring up additional options. Select Reset Brushes.
Now you should have the default Photoshop brushes loaded. One by one, you need
to delete these from the palette. This does not delete them from your computer,
just from the view. Right click on a thumbnail and select "Delete Brush".
Repeat this step until they are gone. If you mess up or just want to start
over, click the small arrow, and "Reset Brushes" which will bring
back the default brushes.
Now you have an empty "brush palette" to
work with. Using the first steps in this tutorial, create your library
of brushes. You might notice that you cannot delete all brushes as there
has to be one in the palette. The way I avoided this was to create a custom
brush, and then remove the very first Photoshop default brush. That way,
when I created more, I was building my own personal library.
Once you are done, open the brush palette again, and click
on the small arrow at the top right. This time, select "Save Brushes".
The file you are saving is the custom brush library file. The file can be found
in the ...Adobe\Photoshop 7.0\Presets\Brushes directory with an .ABR
extension.
Search The Site
Browse desktops by category:


